


Insanity-74
-
Posts
1,526 -
Joined
-
Last visited
-
Days Won
1
Content Type
Profiles
Forums
Events
Gallery
Store
Collections
Posts posted by Insanity-74
-
-
Started cleaning mine with auto glym engine cleaner, then a bit of hot water, fairy liquid and some rice, give it a good shake, came up like new
-
No, on the bottom too, i figured a shiny bottom would be easier to keep clean and help keep rust at bay. But you could leave it after the stone guard if you wanted too. As i mentioned, the por15 glisten r dries like rock so helps keep thigs protected.
-
 1
1
-
-
Anything to get rid of rust isn't going to do any harm as long as it leaves no residue or coating once it's done its job., I just used a wire brush though but that bits up to you.
Although I did use a primer, if I was to do it again I think I would just apply the epoxy mastic to bare metal, them a filler primer, paint then lacquer.
-
Forget the red oxide primer, epoxy mastic sticks better to bare metal....actually that's rather a sweeping statement, I haven't used red oxide primer, after reading up on what it was, and what it is now I decided it wasn't going to add anything, I did however come across a blue primer used largely by farm machine companies, I don't know what it's called but it gets used on some steam train restorations. I got the underside of the car sprayed with it, the guy that did my car also did the flying Scotsman....look up Able Blast, there are pictures on his web site, he may tell you what he uses if you drop him an e-mail or he may not, I don't know if he keeps it a secret or not.
On my project build and I must say after much research and repeated attempts including some absolute blinding failures which involved stripping all the paint off.......again........I would.......
If it's on the outside, remove all the old paint from the panel you are treating, best by media blasting but that's not elways easily available, otherwise, use a rotary wire brush, then give it a good rub down with some course sand paper to give it something to key to. Then give it two or three coats of epoxy mastic, if under the car then 121, if it's on a panel you will see then use 421, after that under the car a good stone guard, more primer then colour and lacquer, a great lacquere to use is por15 glisten r, it's a two pack that dries hard and smooth like glass, even when applied with a brush . If it's an exterior panel then after the 421, a good filler primer colour etc
Whatever you do give it at least a week to harden before starting to put stuff back on, longer if you can, it sounds fruitless, but I can't believe how much harder the glisten r stuff is after a few months of being left, it's like rock.
Then for the inside protection, I use that noxudol stuff, it comes in spray cans which are easy to use, or in tins for spraying from a gun, it's runny so block off any holes, but after a few days it turns waxy. Don't use this stuff until you have finished all the painting...avoids contamination. Wax oil cavity wax is another option more readily available, as a cavity wax it's okay but I don't like it as an external surface wax.
-
-
Shop baught aerosol is rarely a good match, although halfords do offer a custom paint making service thats quite good.
As for the clearcoat, get a white cloth with some t-cut, guve the car a good rub, if the cloth remains t-cut colour then its clearcoated, if it turns red then its straight coloured paint.
I Think Toyota used grey primer.
-
The Deox C, it disolves the rust away leaving just fresh steel.
-
During the course of my project build i have done a bit of research into rust removal and the options out there if you dont own a welder/sand blaster or grinder.
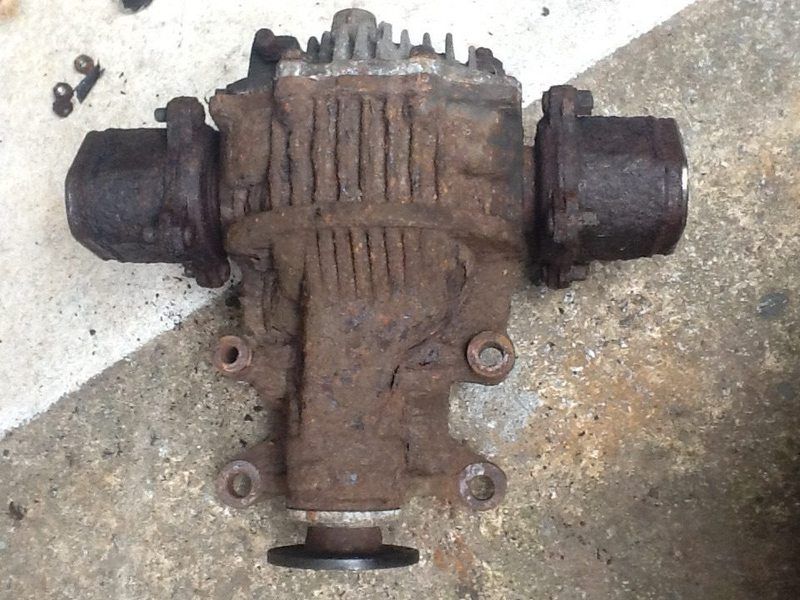
I am a big fan of Bilt Hamber products, if there is something that you can remove from your car then their Deox C powder os brilliant, you make up a solution by mixing it in water and submerse the part in it.
This is a rear diff i did a year or so ago.
Before
After
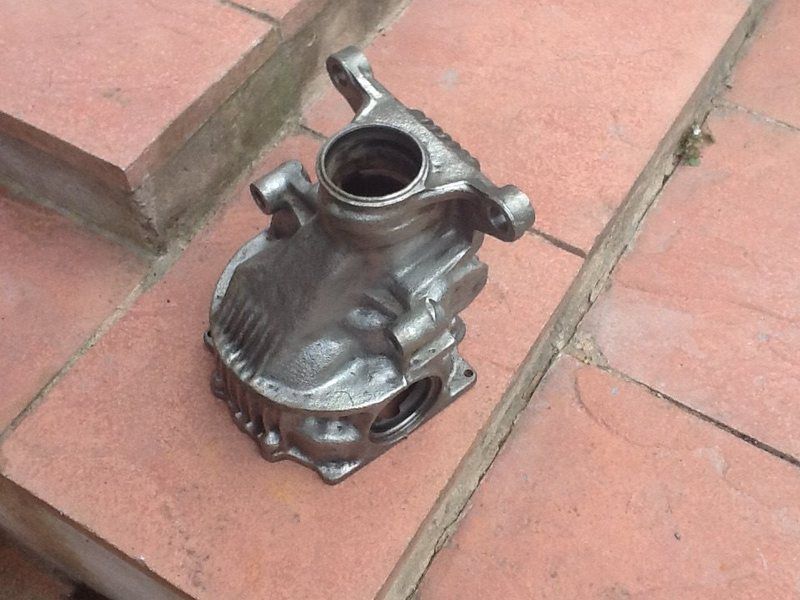
all i did was give it a light scrubbing with a wire brush, i just left it in the solution for about two weeks.
The gell they have is almost as good, but you can paint it onto parts that you cant submerse in the solution, i did my rusty boot lid this week and its come out looking great, no rust at all.
(and no Coke, vinegar etc wont do the same job....i tried it)
After that i have tried a couple of paints,at first i went with a highly recommended product called POR15 rust preventing paint, which i am not a great fan of to be honest, it has a great finish, very smooth and glossy, even when applied with a brush, it just dosnt stick to rust free metal very well, its good if you want to paint over rust, but thats not really the right way to do it.
After that i tried Epoxy Mastix 121 & Epoxy Mastic 421, both very good, the 121 is for the underside and chassis, the 421 is for body panels, both spray on with a gun, and both give a great finish on which to apply the next coat. expensive, but i highly recommend them both. (dont hand paint them with a brush as the finish is rubbish if you do) Not really rust killing paints, but they will help prevent it from coming back.
on top of that you can ut your desired stone guard, there are lots out there and a couple of very good ones, 3M & Soudal spring to mind, i have tried both and prefer the Soudal but they are both pretty much of a muchness. You can paint over the Soudal to match the colour of your car.
The next step of rust defence (which is the last thing you should do) is using a cavity wax. Now i know that loads of people recommend Waxol, but to be honest i hate the stuff, there is much better out there. i tried the winner of the car restorers magazine long term test Noxudol 700, it comes is a can and a canister to attach to a compressor, its quite thin so it leaches into the gaps between metal panels, after about 4 days it waxes up and remains in place. unlike waxol it dosnt harden up and crack.
-
^^^^^^^^^ eh?
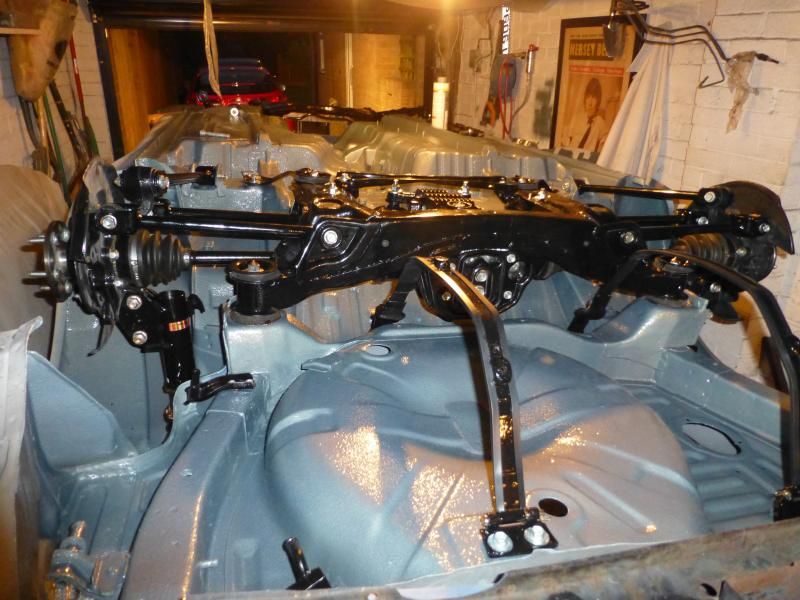
I bought my current faff as a more or less bare shell....saved it from the scrap yard.I have been restoring it for around 4 years so i have never driven it, not even a single yard.
-
1
-
-
Owned mine for four years, and never driven it.....is that a record?
-
1
-
-
Bilt Hamber do a great rust convertor.
For paint either epoxy mastic 121 pr POR15 products.
-
My project build i am not putting any silicone hoses on it at all if i can help it. OEM rubber or stainless braided hoses. I have never known a silicone water hose fail, but they discolour pretty quickly. Also silicone vacuum hose is best avoided. They are okayish, but rips really easily if knicked by something sharp or if its slightly too small internal size. Definately form over function.
-
A friend of mine had his car fully set up by a similar company, corner weighing etc, cost nearly £300 in total but the difference was outstanding. The Car was a Toyota MR2 with a v6 or v8 conversion (I cant remember which?), it went from a twitchy, nervous & unpredictable driving car to something that felt well planted and a pleasure to drive, the difference was like night and day. Its definately on my list of things to do when my project build is complete, in fact after getting it mapped it will be the very next thing I do. Also Andy (Redbeast From The GT4OC) had the same thing done to his RS200 Kit car, funilly enough also a Toyota MRS with a v6 conversion with the same results, I think it cost him slightly less, about £250 if i recall. But he had tried all sorts of things to improve its drivability, tyres, tyre pressures, tracking, different suspension, coilovers, non coilovers, the list goes on.The full set up completely changed his car.
-
1
-
-
It keeps saying "please sign in to view video"????
-
Can you fit the wheel and take the video again? If it's something that goes when brake pressure is applied I would say it's caliper related, not disc related, although my second guess would be a handbrake problem but unlikely.
-
For the resent conversation regarding having a too section I thought i would start my own "Tool Time" thread. I will do a new thread for each one to help with searches so please keep conversations relevant to the topic title.....otherwise Old Red might shout at me

You may or may not agree with me, but i can only comment from my experience and threads like this are all about conversation and learning something new....for all concerned
Starting from the beginning.
What Compressor should I buy?
This is similar to the one I bought.
https://www.machinemart.co.uk/shop/product/details/clarke-raider-1510000-3hp-100-litre-air-compr
Talk about starting with a minefield. There are three things primarily to consider. Firstly your budget, secondly what you want to use it for and thirdly available space.
I would rate them all equally important, theres no use spending a fortune on a nice big compressor if you have nowhere to put it, likewise theres no point in buying a small compressor if it will fall down at every task you throw at it.
Looking at compressor types, personally i would stay away from cheap chinese ebay jobs, but other than that the worlds is your oyster, buy the best you can afford. When looking at compressors three main factors are CFM, HP & Tank Size
CFM = Cubic feet per minute......the amount of air passing through the compressor in one minute. Ideally you dont want to buy a compressor that has less than 14CFM, this will enable you power most air tools and flow enough for paint spraying.
HP = Horse Power.....We all know this one..... Horse power, the ability of the compressor motor to power the compressor. Running from a normal 240v power supply you will be looking at a maximum of around 2.5HP
Tank size = The amount of air in storage. The bigger the tank the more air the compressor will have in storage, again buy the biggest you can afford or have the space for. I dont really know if it makes a vast difference with constant use tools as once it reaches a set low pressure the pump will start up until it returns to maximum level. if the tool uses the same amount of air the compressor produces it will never catch up regardless of tank size!!!
The compressor I went for was a 2.5BHP 14.5CFM with a 150 litre tank from Machine mart, not the greatest quality but so far it has worked faultlessly. I didnt have enough space in the garage so i built a small shed outside and it lives in there quite happily......so does a mouse which takes great delight in nesting in the sound insulation I put in.
When you buy a compressor, if you buy a free standing on that has no wheels, its worth buying some feet for it, this greatly helps reduce the noise from the compressor and reduces the vibration of the compressor into the garage.
What Else Will i Need?
Buying the compressor is just the start of it. Theres a whole bunch of other bits n bobs to do the job correctly. If you are using it for airtools, then I would fit an inline oiler, this adds a small amount of oil into the airflow to help keep the airtools lubricated......but be aware, if you want to use it for paint spraying as well, the last thing you want is to have oil in the line.
You will need an adjustable valve/Regulator so you can control the amount of air going to the tool/gun or whatever.
https://www.machinemart.co.uk/shop/product/details/clarke-fr2-filter-regulator
Also you will need several joints, all of mine are the snap on type so you can quickly disconnect the line at any of its joints.
Line will be needed to go from the compressor to the valve.
https://www.machinemart.co.uk/shop/product/details/clarke-3m-braided-8mm-14-bsp-nut-tail-air
A reel of line will be needed to trawl around the garage, buy a big enough line that will stretch from where you have it in the garage to the furthest point of your driveway, you can almost guarantee you wont park close enough when you need to inflate a tyre or undo a wheel nut etc
https://www.machinemart.co.uk/shop/product/details/clarke-9-metre-retractable-air-hose-reel-car
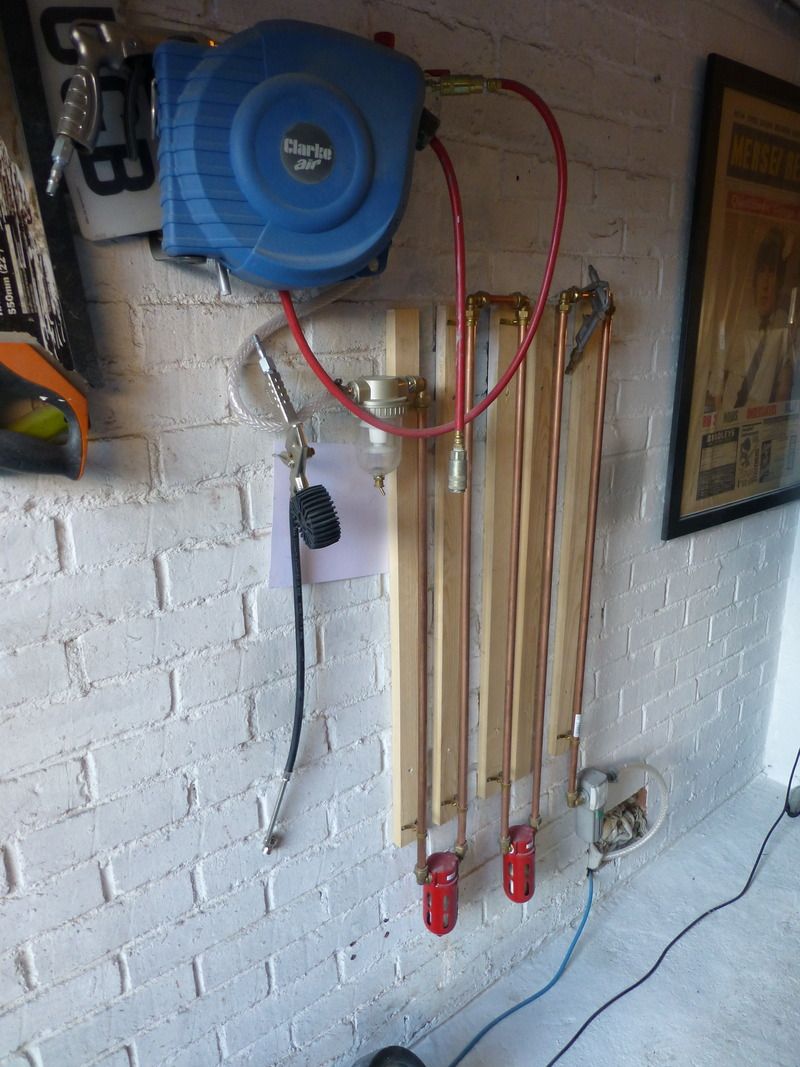
If you are going to use it for paint spraying, you will also need a filter set up. I have 5 filters on my line and it is just enough to make the air dry enough for spraying, if you have water vapour in the spray line you will get micro-blisters come through in the paint sooner or later. I use self emptying filters that discharge the water in them when the pressure inside gets low.
at lesast 4 of these
https://www.machinemart.co.uk/shop/product/details/cat75-airline-filter-with-auto-drain
This is my set up, joined together by copper heating pipes.....
What Tools should i buy?
This one is entirely up to you, the only comment i would make is that even with a fairly capable compressor I find airtools really underpowered and much prefer an electrical power tool so all i really use my compressor for is spray painting, pumping up tyres and the blast of air for cleaning things. Everything else is power tools. I might try an airgun for my 1/2" sockets see how it goes.
I am sure there are loads more things to mention and talk about, but i am sure they will crop up through the course of this thread....or i will add when i think of them
Paint guns
Just one thing to add about paint guns.
Buy the best one you can aford. Go for as gravity fed one (with the paint container on top of the gun.)
Add a small inline filter just before the gun, if you see it gathering water it means the other filters arnt enough and you will likely have water in your paint...stop spraying and wait for either a drier day, or add another filter into your line.
-
3
-
-
Typical though on the TV coverage, just as the ST205 lines up on the rally stage they cut to the super cars going up the hill.
Enjoyable watch though, keep meaning to go.....oh well maybe next year.
-
Must be my work laptop, will have a gander when i get home....unless you took a photo of a small red X
-
pictures arnt working???
-
Niall, as I am about to embark on my bumper repair would you recommend scuff pads to key it with
I would start with 400/600ish wet n dry and use it dry, then go over it with scuff pads then a tack cloth! i used a rough grade scuff pads, it helps clean out all the dust etc, also you can try a platic prep spray, its like a clear watery spray that helps prepare plastic surfaces for spraying, a bonding agent. but thats for clean plastic not already painted plastic!.
Once its primered you can use 'maybe' 800 grit but i wouldnt go smoother until the lacquer, and only then if you need to if you are getting scratch marks from the wet n dry coming through. Its all a bit trial and error, it needs to be rough enogh to leave a good surface to key to, but not so rough as it leaves marks through the freshly sprayed paint. IMO You dont need to go super smooth until you are ready to polish the lacquer.
Also after the primer I would leave it for a week somewhere warm to dry out and fully cure, give it chance to settle before adding the colour coat.
I prepped my bumper this weekend with 400 grit and used it throughout until ready for colour, i will then move to 600 which i will continue to use until its lacquered
-
Dont wet n dry between coast with anything too smooth or the paint will have nothing to key to.
-
I went 200 - 400 - 800 - Paint - 800 - Paint - 800 - Paint - 800 - lacquer - lacquer - 1200 - 2000 - 3M fast cut - scratch x - pure polish - carnauba wax - done
-
1
-
-
I use rain x all the time, apply it every time you wash the car for a few months and it builds up, takes ages to wipe off. Great stuff, I do the headlights, all windows several times with only one bottle. Apply it with a paper towel, leave it to dry, spray it with a hose pipe, job done. No buffing or rubbing needed.
-
Paraffin works well, used that a lot, diesel is supposed to be as good but never used it myself.


to cat or not to cat. that is the question
in General Celica Discussion
Posted
There was a test change something like six years ago and rules on a cat test are simple, if your car came from the factory fitted with a cat, guess what! No matter how much you argue that its an import or not etc etc, its going to have to have a cat test. Unless you can find an mot tester willing to put another car through or run a non cat test (after all who has ever had there mot certificate checked out?) But i will have a cat fitted to my project build as without wishing to sound like a tree hugging hippy (which i am not) I care about the health of my daughter and the world i will leave behind, i dont want to add to an already poluted world for her and her generation to clean up......and there isnt that much of a difference, after removing the cat for the same reason as everyone else come mot time i put it back on, couldnt really tell the difference and ran the car for six+ years without having to worry about the mot, or putting the cat back on etc etc.