Guide to changing CV joint
Guide to changing CV joint/driveshaft/hub
This wiki was written following Mani's intial guide, with work and photos done by Tony-94. It specifically covers the replacement of the CV joint, but is also applicable to replacement of the driveshaft and hub.
- Special tools needed: deep 30mm socket (1/2 inch drive) or standard 30mm (3/4 inch drive)Everything else should be fine with a decent socket wrench set and standard toolkit.
- While this is a fairly straightforward job, theres a few things that need unbolting etc so give yourself plenty of time in case you come across the usual setbacks like seized on bolts etc. 2- 3 hours. An assistant is useful but this job can be done alone.
- 1. First jack up the car on the side you're working on, remove wheel
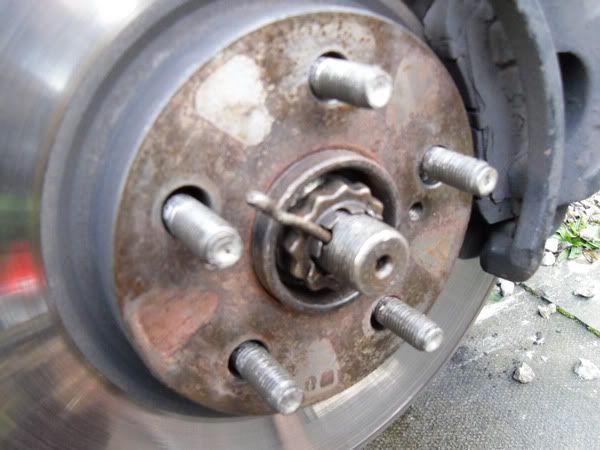
- 2. remove the lock pin and cap from the driveshaft
[img]http://i8.photobucket.com/albums/a14/Tony-94/driveshaft-nut-and-pin.jpg[/img]
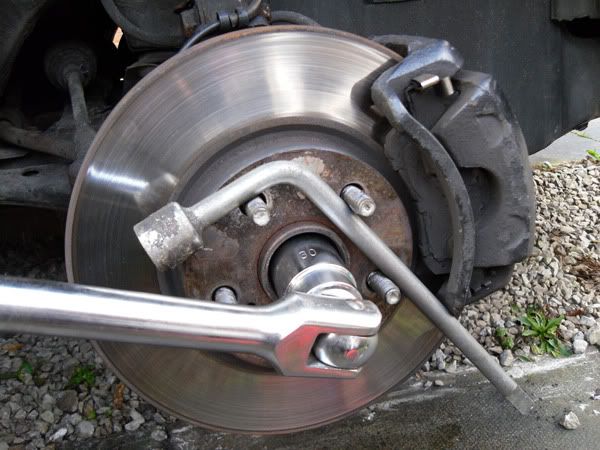
- 3. Undo the driveshaft nut. Its a big bugger at 30mm so check you've got the right kit to remove it, if using 1/2 inch drive wrench you'll need a deep socket because of the driveshaft thread. Mine was on pretty solid but I was using a heavy duty 3/4 inch drive socket wrench. If it still wont budge use a breaker bar.
Obviously the whole hub will turn so have an assistant to step on the brakes or wedge a tyre wrench between the hub and caliper to lock it and stop it turning like I did.
[img]http://i8.photobucket.com/albums/a14/Tony-94/undoing-ds-nut-1.jpg[/img]
- 4. remove the brake caliper and rest it somewhere to prevent damage to the brake lines. I just used the wheel :)
[img]http://i8.photobucket.com/albums/a14/Tony-94/caliper-off.jpg[/img]
- 5. You may as well remove the disc at the same time, it comes off easily enough and stops it getting in the way.
[img]http://i8.photobucket.com/albums/a14/Tony-94/disc-off.jpg[/img]
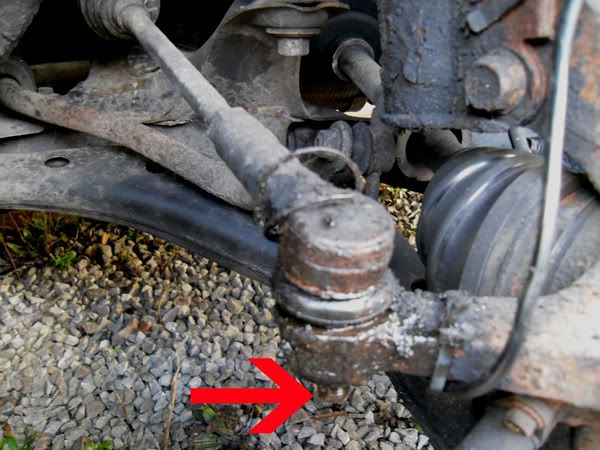
- 6. At this point work on the steering arm end, which is secured by a nut and locking pin.
[img]http://i8.photobucket.com/albums/a14/Tony-94/steering-arm-and-nut.jpg[/img]
If you hit the hub exactly where the arrow is (see second pic below) with a heavy hammer (be careful not to hit the steering arm end or the boot) the end should free up, just have the end nut on finger tight so it doesn't fly into your face. If you have a puller, that can also be used to seperate the end.
[img]http://i158.photobucket.com/albums/t106/usman_performance/steering-arm-and-nut.jpg[/img]
If the end simply wont budge, there is an alternative by unbolting the strut's two bolts. It doesn't need to removed altogether, just allows it to seperate from the hub. The idea with both techniques is to enable the hub to be maneuvered later on.
[img]http://i8.photobucket.com/albums/a14/Tony-94/strut-off.jpg[/img]
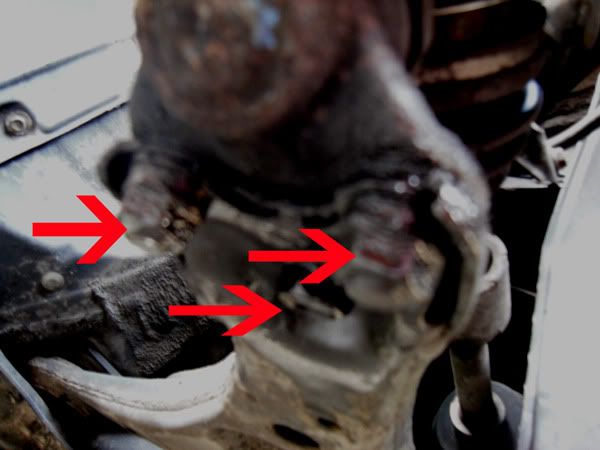
- 7. undo the 3 lower wishbone bolts.
[img]http://i8.photobucket.com/albums/a14/Tony-94/sway-bar-blots-2.jpg[/img]
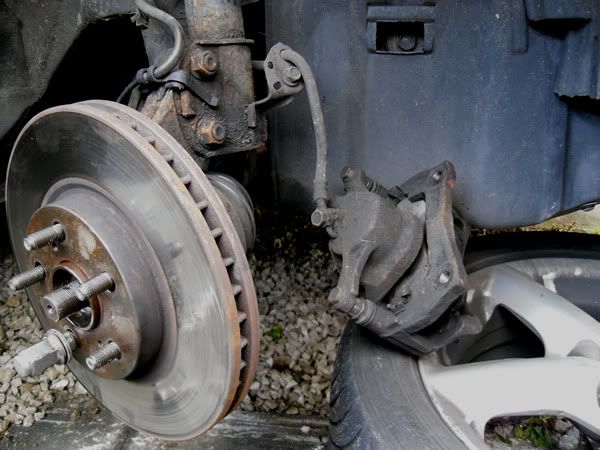
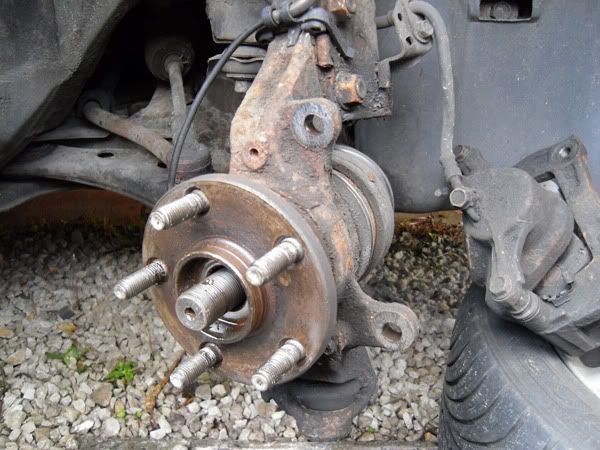
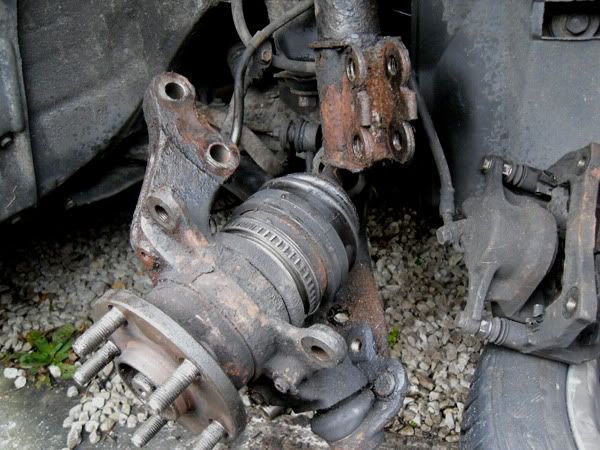
- 8. With the wishbone and either steering arm or strut unbolted, you should now find it possible to seperate the hub and driveshaft. (If you are replacing the hub, you'll need to unbolt the wishbone, steering arm and strut)
[img]http://i8.photobucket.com/albums/a14/Tony-94/hub-off.jpg[/img]
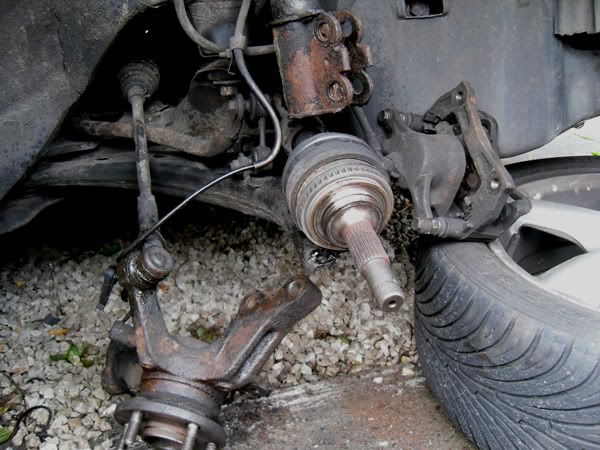
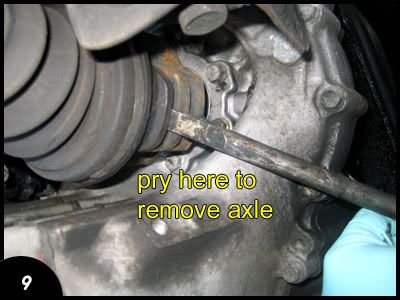
- 9. At this point you can either attempt to remove the driveshaft completely or work on the cv in place, whatever you find easier. I found it possible to work on the CV joint in place.
If you decide to remove the driveshaft it needs to be pryed free from the transmission as shown in the pic below. If the car is jacked up only on the side you are working on, there *should* be no fluid loss but be aware of that possibilty. Depending what side you're working on there may be two bolts securing the driveshaft about half way along its length. The driveshaft simply clicks into place. It will take some effort to remove, you'll need a large flat head screwdriver to lever it out from the transmission. Make sure to lever in different places around it where access is possible to avoid damaging the internal shaft. Likewise when replacing, when its securely in place it should not come out without some effort. Its advisable to get a new oil seal (where the driveshaft meets the transmission) as the old one may lose its effectiveness during the process.
[img]http://i263.photobucket.com/albums/ii131/jasonnguyen_/CV%20AXLE/9.jpg[/img]
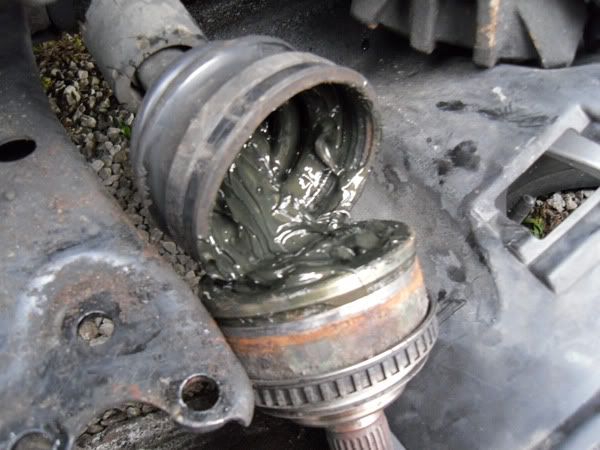
- 10. undo the two cv boot clips and pull back the rubber boot to expose the joint. Its very greasy in there, its best to remove any old grease from the driveshaft as you'll be using new stuff.
[img]http://i8.photobucket.com/albums/a14/Tony-94/boot-off.jpg[/img]
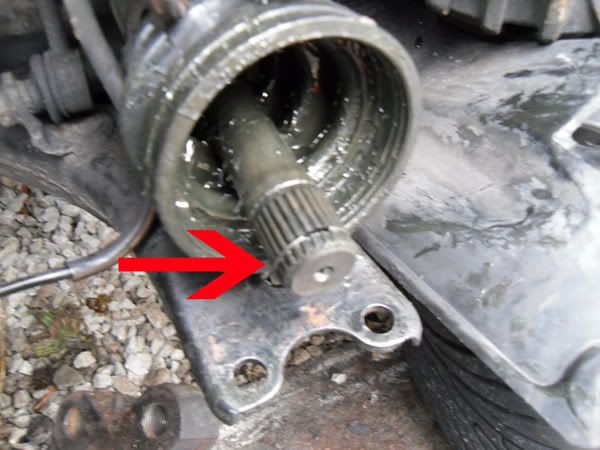
- 11. at this point, it was possible to seperate the cv joint with a tap from a hammer. photo shows the circlip which locks the joint to the driveshaft. This can occasionally be tricky - if you can source a proper CV joint circlip removal tool its easier especially when re-fitting.
[img]http://i8.photobucket.com/albums/a14/Tony-94/joint-off-and-circlip.jpg[/img]
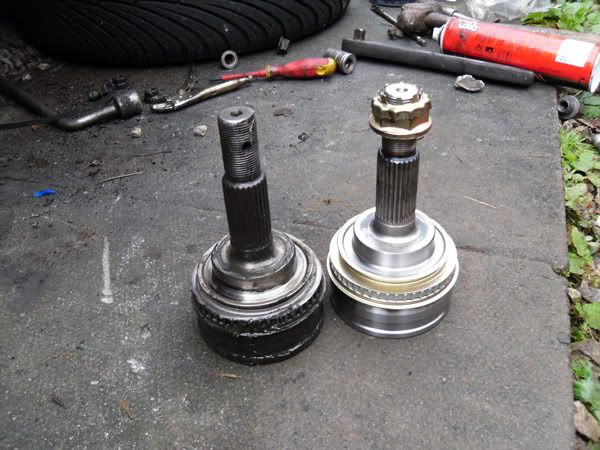
- 12. now fit on a new cv boot if supplied and the boot clips. Pack the new joint as well as the driveshaft with plenty of grease, making sure it gets in all the ball bearings. Refitting the new cv joint is a case of lining up the splines and sliding it on.
The cv joint is supposed to pushed on so that the circlip clicks into place in the inside end of the cv joint spline, locking it in place. It may require tapping in with a hammer, but so as not to damage the thread of the shaft, put the main hub bolt back onto the end then place a wooden block in front, then hammer it a bit. As before suggest using the correct cv joint circlip tool if possible or alternative you can find - you're looking to close up the clip so the joint slides in place unrestricted before letting go so the clip opens again and locks in place. Its crucial the circlip locks in place else the joint can become lose and potentially snap the driveshaft so make sure its not possible to pull the joint off by manual force.
[img]http://i8.photobucket.com/albums/a14/Tony-94/old-and-new-joint.jpg[/img]
Refitting of everything else is of course the reverse of removal. :)