Difference between revisions of "Interior 6/climate control fitting"
(New page: (Originally wrote by cavegod) Right well i thought i would wright a how to so here goes you will need. JDM parts A/C fan A/C compressor [img]http://img.photobucket.com/albums/v79/cav...) |
m (added link) |
||
| Line 1: | Line 1: | ||
| − | (Originally | + | (Originally written by cavegod) |
| − | Right well | + | Right well I thought I would write a how to so here goes |
you will need. | you will need. | ||
| Line 23: | Line 23: | ||
heater duct assembly | heater duct assembly | ||
| − | + | evaporater housing | |
temp mixer cable | temp mixer cable | ||
| Line 53: | Line 53: | ||
[img]http://i125.photobucket.com/albums/p73/md84419/airconeculoom-1.jpg[/img] | [img]http://i125.photobucket.com/albums/p73/md84419/airconeculoom-1.jpg[/img] | ||
| − | + | If your car has Air conditioning you will need to swap a few things but for this mod take it as having no air con at all, the Celica gen6 should have the wiring in place for normal aircon system so to make sure check for a few things. | |
| − | + | Behind glove box should be a large multi-plug above the blower duct and a multi-plug below blower ducting both will be taped to the wiring loom in the respective places. In the engine bay you should check for a grey connector taped up near the diagnostic port and one taped to the wires on the radiator pipe from the thermostat, and last but not least a plug taped up near the left hand relay box. | |
| − | + | Once you have made sure you have them away we go! | |
| − | + | Remove the dash board | |
[img]http://img.photobucket.com/albums/v79/cavegod/Photo-0086.jpg[/img] | [img]http://img.photobucket.com/albums/v79/cavegod/Photo-0086.jpg[/img] | ||
| − | + | With the dash board out of the way remove the metal tubular frame as well, then you can get to work. | |
| − | + | Remove the following | |
| − | + | In engine bay disconnect the heater hoses and mixer cable | |
| − | + | In the car remove the blower ducting and the heater duct assembly | |
| − | + | With those out the way you can start the install | |
| − | + | Fit the JDM heater duct assembly thread the mixer cable through to the engine bay and heater hoses, then bolt it in and connect the cable and hoses to their respective places. | |
| − | + | Next remove the blanking panel from the bulk head and then bolt the evap housing in place. In the engine bay fit the JDM plate over where the Evap pipe work enters the engine bay. | |
[img]http://img.photobucket.com/albums/v79/cavegod/Photo-0001-1.jpg[/img] | [img]http://img.photobucket.com/albums/v79/cavegod/Photo-0001-1.jpg[/img] | ||
| − | + | Then fit all the engine bay A/C parts just a matter of bolting them in place, compressor torque is 25nm and all A/C pipes are 10nm. Fit the A/C fan to the radiator using the three bolts and then plug it in as well as plugging in the compressor and the pressure switch. Thats the engine bay done. Next up is wiring the beast in! | |
| − | + | Cavegod nor I take any responsibility if your car is affected or damaged in anyway after following these instructions and neither he or I will be held responsible. | |
| + | |||
| + | |||
| + | |||
| + | |||
| + | |||
| + | |||
| + | |||
| + | |||
| + | |||
| + | |||
| + | ---- | ||
| + | |||
| + | [[Generation_Six|back to gen6 Mods]] | ||
Latest revision as of 06:06, 17 August 2009
(Originally written by cavegod)
Right well I thought I would write a how to so here goes
you will need.
JDM parts
A/C fan
A/C compressor
[img]http://img.photobucket.com/albums/v79/cavegod/Photo-0050.jpg[/img]
A/C pipe work
[img]http://img.photobucket.com/albums/v79/cavegod/Photo-0272.jpg[/img]
A/C radiator
3 relays
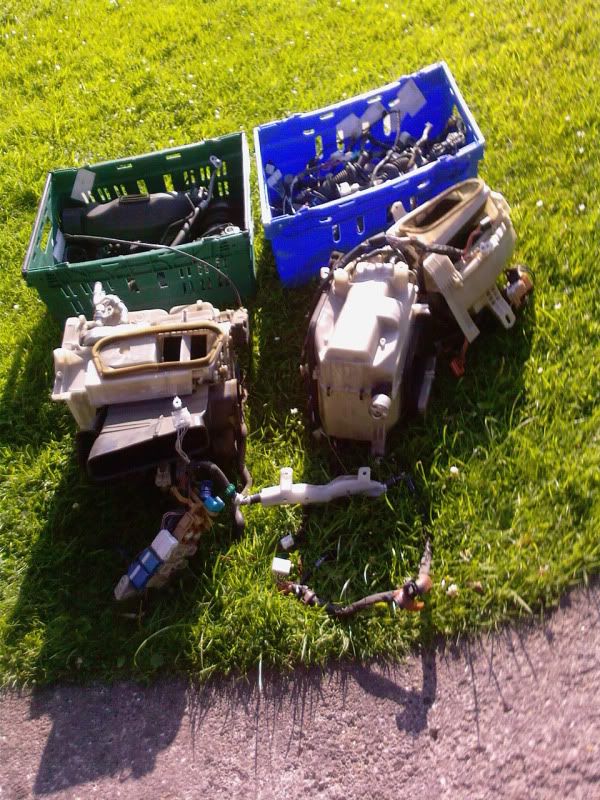
heater duct assembly
evaporater housing
temp mixer cable
[img]http://img.photobucket.com/albums/v79/cavegod/Photo-0271.jpg[/img]
ambient temp sensor
cabin temp sensor
[img]http://i125.photobucket.com/albums/p73/md84419/cabintemperaturesensor-1.jpg[/img]
solar sensor middle one
[img]http://i125.photobucket.com/albums/p73/md84419/airconunitsensorslightlevelsesor-1.jpg[/img]
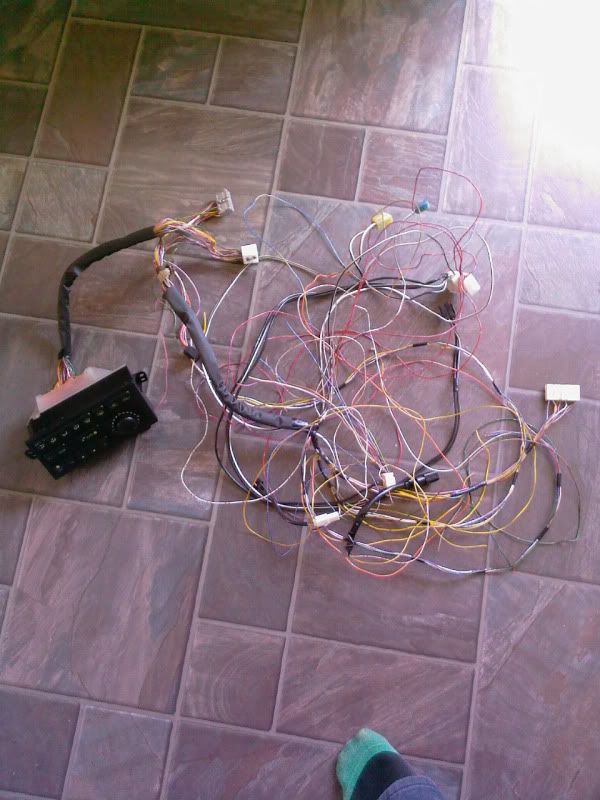
Climate control unit
[img]http://img.photobucket.com/albums/v79/cavegod/Photo-0056-1.jpg[/img]
CC wiring
[img]http://img.photobucket.com/albums/v79/cavegod/Photo-0280.jpg[/img]
you will need the wiring on the evap and heater duct assemblies
[img]http://i125.photobucket.com/albums/p73/md84419/jdmairconloom2-1.jpg[/img]
[img]http://i125.photobucket.com/albums/p73/md84419/airconeculoom-1.jpg[/img]
If your car has Air conditioning you will need to swap a few things but for this mod take it as having no air con at all, the Celica gen6 should have the wiring in place for normal aircon system so to make sure check for a few things.
Behind glove box should be a large multi-plug above the blower duct and a multi-plug below blower ducting both will be taped to the wiring loom in the respective places. In the engine bay you should check for a grey connector taped up near the diagnostic port and one taped to the wires on the radiator pipe from the thermostat, and last but not least a plug taped up near the left hand relay box.
Once you have made sure you have them away we go!
Remove the dash board
[img]http://img.photobucket.com/albums/v79/cavegod/Photo-0086.jpg[/img]
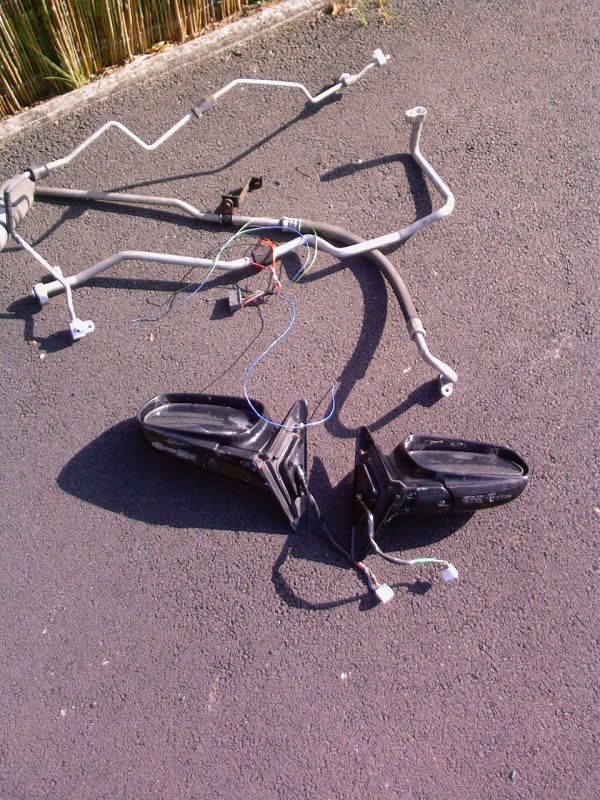
With the dash board out of the way remove the metal tubular frame as well, then you can get to work.
Remove the following
In engine bay disconnect the heater hoses and mixer cable
In the car remove the blower ducting and the heater duct assembly
With those out the way you can start the install
Fit the JDM heater duct assembly thread the mixer cable through to the engine bay and heater hoses, then bolt it in and connect the cable and hoses to their respective places.
Next remove the blanking panel from the bulk head and then bolt the evap housing in place. In the engine bay fit the JDM plate over where the Evap pipe work enters the engine bay.
[img]http://img.photobucket.com/albums/v79/cavegod/Photo-0001-1.jpg[/img]
Then fit all the engine bay A/C parts just a matter of bolting them in place, compressor torque is 25nm and all A/C pipes are 10nm. Fit the A/C fan to the radiator using the three bolts and then plug it in as well as plugging in the compressor and the pressure switch. Thats the engine bay done. Next up is wiring the beast in!
Cavegod nor I take any responsibility if your car is affected or damaged in anyway after following these instructions and neither he or I will be held responsible.